
Author: Vasi Popovici
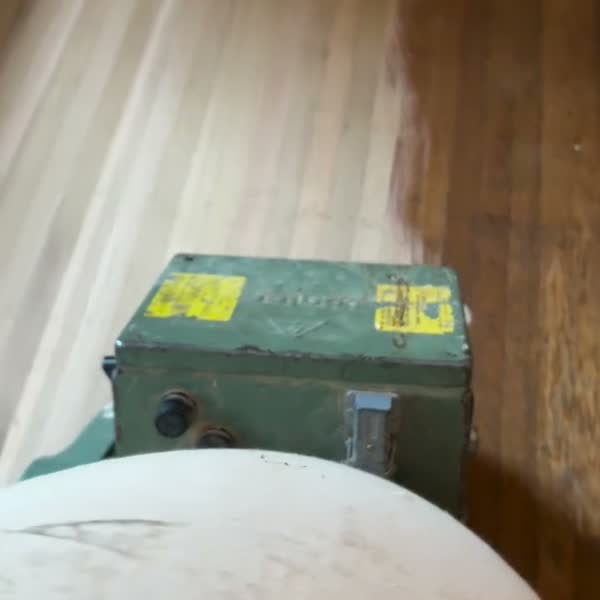
If you own an older home in Portland—whether it is a 1910 Craftsman bungalow in Sellwood, a mid-century ranch in Cedar Hills, or a classic four-square in Northeast Portland—you have probably looked at your worn, scratched hardwood floors and thought, "Maybe I can refinish those myself."
It is a tempting idea. The local tool rental shop has drum sanders lined up, and online videos are filled with homeowners easily restoring their floors in a single weekend. It looks satisfying, straightforward, and above all, cheap.
But as local flooring professionals who have been called in to rescue hundreds of DIY projects gone wrong across the Portland metro area, we know the real story. Refinishing hardwood is not like painting a room or putting up some drywall.
It is a highly demanding, technical craft that requires:
- Specialized, heavy machinery
- Precise technique
- A deep understanding of how different wood species react to sanding and finishes in our unique Pacific Northwest climate.
When you look past the initial rental fees and actually add up the cost of equipment rentals, sandpaper, professional-grade finishes, protective gear, waste disposal, and the value of your own time, the financial equation changes. In this guide, we will break down the true cost of DIY floor refinishing versus hiring a Portland professional, looking at the hidden expenses, the physical toll, and the risks that could end up costing you twice as much in the long run.
The Rental Equipment Reality: What You Actually Get
The first mistake most homeowners make is assuming that the rental sanders from the local hardware store are the same machines used by professional crews. They are not.
Professional floor sanders are heavy, 220-volt belt-driven machines that weigh anywhere from 150 to 220 pounds. They run on dedicated electrical circuits and are designed to cut perfectly flat across the floor with immense downward pressure.
In contrast, rental drum sanders are typically 110-volt machines designed to run on standard household outlets. To make them manageable for the average homeowner to lift into the back of a truck, they are designed to be much lighter.
Because they lack weight and power, they tend to bounce and skip across the wood rather than cut cleanly. This bouncing creates what we call "chatter marks"—tiny, wavy ridges across the floor that are almost invisible to the naked eye when the wood is bare, but stand out like a sore thumb as soon as you apply a dark stain or a shiny topcoat.
Additionally, rental machines are rarely maintained to professional standards:
- The drum may have flat spots from previous users dropping the machine while it was running.
- The wheels might be misaligned, causing the sander to cut deeper on one side than the other.
- If you use a machine with these issues, you will end up with permanent gouges and uneven slopes in your hardwood.
The True Cost of DIY: A Detailed Budget Breakdown
Let us look at the actual numbers. Many homeowners assume a DIY job will only cost a couple of hundred dollars. Let us build a realistic budget for refinishing a typical 800-square-foot living and dining room area over a four-day period (which is the minimum time a novice will need to complete the work properly).
1. Equipment Rental Costs
- Heavy Duty Drum Sander: $80 to $100 per day. For 4 days, that is $320 to $400.
- Edge Sander (Edger): Required for getting right up to the baseboards. $45 to $60 per day. For 4 days, that is $180 to $240.
- Heavy-Duty Buffer/Polisher: Required for screening between coats to ensure adhesion and smoothness. $50 per day. For 2 days of use, that is $100.
- Commercial Vacuum: A standard shop-vac will clog instantly and spew fine dust back into the air. Renting a vacuum with a HEPA filter is highly recommended. $40 per day. For 4 days, that is $160.
- Subtotal for Rentals: $760 to $900.
2. Abrasives and Consumables
You cannot reuse sandpaper. Wood sanding requires multiple passes with progressively finer grits (typically starting with 36-grit for finish removal, moving to 60-grit, then 80-grit, and finishing with 100-grit).
- Drum Sander Belts: You will need about 4 to 5 belts per grit. At $10 to $15 per belt, that is $160 to $300.
- Edger Discs: You will go through dozens of these because they burn quickly when hitting old finish or nails. $60 to $100.
- Buffer Screens: For smoothing the floor before finish and between coats. $30 to $50.
- Subtotal for Abrasives: $250 to $450.
3. Professional-Grade Finishes and Sealers
If you buy cheap polyurethane from a big-box store, your floors will look worn out within two to three years. Professional-grade finishes, like Bona Traffic HD, are water-based, highly durable, low-VOC, and dry quickly. However, they are expensive.
- Wood Sealer (1 coat): You will need about 2 to 3 gallons for 800 square feet. $80 per gallon. Total: $160 to $240.
- Two-Component Water-Based Finish (2 coats): You will need 4 to 5 gallons. $120 to $150 per gallon. Total: $480 to $750.
- Tack Cloths, Rollers, and Applicators: $50.
- Subtotal for Finishes: $690 to $1,040.
4. Safety Gear and Prep Materials
- Respirators and Cartridges: Essential for protecting your lungs from toxic old finishes and fine wood dust. $50.
- Safety Glasses and Ear Protection: $20.
- Knee Pads: You will spend hours on your knees edging. $30.
- Plastic Sheeting and Painter's Tape: For sealing off doorways, registers, and cabinets. $40.
- Subtotal for Safety/Prep: $140.
Total Estimated DIY Cost: $1,840 to $2,530
This budget assumes everything goes perfectly. It does not account for the cost of wood filler to patch gaps, board replacements for water-damaged sections, or the cost of repairing mistakes. It also assumes you already own basic tools like hammers, pry bars for removing shoe molding, scraper tools for corners, and trash cans.
The Dust Containment Battle: Clean Air vs. Fine Siliceous Dust
One of the largest differences between a DIY attempt and hiring a professional is dust control.
Wood dust is a known carcinogen, and sanding off old finishes—which may contain lead paint or older toxic chemical compounds—creates a serious health hazard.
A rental sander comes with a cloth dust bag. At best, these bags capture about 70% to 80% of the heavy sawdust. The finest, most dangerous dust particles pass right through the cloth fabric and escape into your home. This fine dust will:
- Float through the air
- Get sucked into your HVAC system
- Coat the inside of your ductwork
- Settle on your kitchen countertops
- Find its way into every drawer and closet
Homeowners who go the DIY route often spend weeks cleaning their house afterward, wiping down walls, washing clothes, and replacing furnace filters multiple times.
Professional flooring contractors use truck-mounted or high-powered portable dust containment systems (often called DCS). These systems use heavy-duty vacuums connected directly to the sanders by long hoses. The air is filtered through medical-grade HEPA filters, capturing 99.8% of the dust at the point of creation and sending it out of the home. Your furniture, walls, and lungs remain completely clean.
Common DIY Mistakes that Cost Money to Fix
Sanding a wood floor looks easy, but it requires muscle memory and fine touch. The drum rotates at high speeds. If you stop moving for even a fraction of a second while the drum is in contact with the wood, the sander will dig a permanent, scoop-shaped groove into your floor. We call these "drum marks" or "stop marks."
Here are the most common errors we see on DIY jobs that require professional remediation:
- Deep Drum Gouges: Homeowners drop the sander drum too quickly or hesitate when starting their forward walk. Fixing this requires resanding the entire floor to the depth of the gouge, which strips away valuable wear layer thickness.
- Halo Effects Around the Room: The edge sander cuts differently than the drum sander. If the transition between the center of the room and the edges is not blended carefully by hand-sanding and buffing, you will see a bright or dark "halo" ring around the perimeter of your rooms once the stain or finish is applied.
- Lap Marks and Splotchy Stain: Staining wood is notoriously difficult for beginners. If you do not apply and wipe the stain evenly, or if the wood was not sanded to a uniform smoothness, the stain will soak in unevenly, leaving dark patches, lap lines, and raw spots.
- Peeling Finish (Adhesion Failure): If you do not clean the dust off the floor perfectly, or if you apply the finish too thick, too thin, or too fast, it will bubble, cloud, or fail to bond. When this happens, the only fix is to sand the floor back down to bare wood and start over.
- Sanding Through the Wear Layer: Old solid hardwood floors can only be sanded 4 to 6 times in their lifespan. If you have engineered floors, the wear layer is much thinner (often only 2 to 4 millimeters). A rental sander in inexperienced hands can easily sand right through the wear layer to the plywood core, ruining the entire floor and forcing a complete replacement.
The Timeline and Labor Equation
How much is your free time worth? A professional crew can typically prep, sand, seal, finish, and clean a three-room home in 3 to 5 business days. Because they have the experience and the equipment, they move quickly and efficiently.
For a homeowner working alone or with a partner, the timeline is very different:
- You have to spend a day driving around to rent the equipment, loading it (these machines are extremely heavy and require two strong adults to lift), and reading the manuals.
- The sanding process will take at least twice as long because you have to work slowly to avoid mistakes.
- Edging the perimeter of an 800-square-foot space will require 10 to 15 hours of crawling on your knees, holding a heavy, spinning disc sander that wants to pull itself out of your hands.
After sanding, you must spend hours vacuuming and tacking the floor, followed by applying the sealer and multiple coats of finish, waiting for each coat to dry according to the local temperature and relative humidity. In total, a DIY project will easily consume two full weekends and several weeknights. If you make a mistake and have to sand a room down again, that timeline doubles.
Why the Professional Approach Saves Money Long-Term
When you hire a professional flooring contractor in Portland, you are not just paying for labor; you are paying for an insurance policy for your home’s most valuable architectural feature.
Here is what a professional team brings to the project:
- Commercial Equipment: Using heavy, 220V professional belt sanders guarantees a perfectly flat, wave-free floor.
- True Dustless Sanding: Your HVAC system, furniture, and family are protected from fine dust.
- Moisture Testing: Professionals use specialized moisture meters to test the wood and the subfloor before starting, ensuring the wood is stable and will not cup or gap after finishing.
- Premium Finishes: Access to commercial-grade, multi-component water-based polyurethanes that are not sold to the general public. These finishes dry fast, do not yellow, and can withstand traffic from kids, pets, and muddy boots for a decade or more.
- Craftsmanship: The skill to perform invisible board repairs, blend stains seamlessly, and hand-scrape hard-to-reach corners.
If a DIY job fails and needs to be resanded by a professional, you will end up paying for the rental equipment, the wasted materials, and then the full cost of the professional refinishing anyway. Even worse, you will have removed two sandings' worth of wood from your floor's lifespan, reducing the number of times it can be restored in the future.
If you want to ensure your floors are restored to their historic beauty without the dust, the backaches, and the risk of costly mistakes, we are here to help.
Where Flooring PDX works
We're based in Portland and serve homeowners across the metro. If you're starting a project, here's where we already have local experience and project history:
Cities we serve: Portland · Beaverton · Lake Oswego · West Linn · Gresham · Happy Valley · Clackamas · Oregon City · Tigard · Tualatin · Hillsboro · Aloha · Bethany · Wilsonville · Vancouver, WA · Camas, WA.
Sub-neighborhoods with dedicated guides: Sellwood · Alameda · Hawthorne · Eastmoreland · Mount Tabor · St. Johns · Cedar Hills · Progress Ridge · Lake Grove · First Addition · Bull Mountain · Orenco Station.
Services: Hardwood refinishing · Hardwood installation · Dustless sanding · Hardwood floor repair · Luxury vinyl plank.
For pre-listing scopes and realtor partnerships, see our realtor page. When you're ready, request a free quote - most go out within 36 hours.