Restoring historic hardwood floors in Portland homes
A complete guide to identifying and restoring historic old-growth wood floors, including Douglas fir and oak, in vintage Portland Craftsman and Victorian homes.
Portland is famous for its historic residential architecture. Walk through inner-city neighborhoods like Ladd's Addition, Sellwood, Irvington, Laurelhurst, or Hawthorne, and you will find streets lined with beautiful Craftsman bungalows, Queen Anne Victorians, and classic Portland Foursquares. These homes possess a character that is impossible to replicate in modern construction.
At the heart of this character is the flooring. The floors in these historic properties have survived decades of foot traffic, furniture movement, and changing home trends. If you own one of these historic homes, you might be sitting on a treasure: original, old-growth wood floors.
Restoring these classic floors is a unique challenge that requires specialized knowledge and a careful approach. Unlike modern pre-finished floors, historic wood requires a deep understanding of:
- Old-growth timber
- Vintage fasteners
- Traditional finishing techniques
Here are the secrets to sanding and renovating classic Portland Craftsman floors, from identifying the wood species to deciding whether to restore or replace.
Identifying your historic wood species
Historic Portland homes built between 1900 and 1940 primarily feature old-growth Douglas fir (common in Craftsman subfloors and upstairs bedrooms) and old-growth red or white oak in formal living areas. Identifying the species ensures the correct sanding grit, grain matching, and finish sealers are selected.
Old-growth Douglas fir
Douglas fir was the workhorse of early Pacific Northwest construction. In many Craftsman bungalows and foursquares, Douglas fir was actually installed as the utility floor or subfloor, particularly in kitchens, bedrooms, and upstairs hallways. Over time, these floors have aged into a warm, reddish-orange color with a prominent, straight grain pattern.
Because Douglas fir is a softwood, it is much softer than oak. It dents and scratches easily, but it also carries a beautiful patina and history. Sanding fir requires a gentle touch because the drum sander can easily dig deep gouges into the soft grain if not operated correctly.
Old-growth oak (red and white)
Oak was the premium choice for the formal spaces of the home, such as the entryway, living room, and dining room. Old-growth oak has much tighter growth rings than modern oak flooring, which makes it denser, more stable, and highly resistant to wear.
Many historic Portland homes feature quarter-sawn white oak, which shows beautiful ray flecks (the reflective patterns in the grain) and is incredibly durable. If your floor has thin planks (typically 1.5 inches to 2 inches wide) with decorative border inlays made of walnut or mahogany, you are looking at a classic high-end Edwardian or Craftsman installation.
The wear layer: can the floor be saved?
Before we start sanding, we must determine if the floor has enough wood left to survive the process.
Every time a hardwood floor is sanded, a thin layer of wood is removed (usually about 1/32 to 1/16 of an inch). A standard 3/4-inch solid wood floor can typically be sanded four to six times over its lifetime.
To check if your floor can be sanded again, look for a spot where you can see the side profile of the boards. Good locations include:
- Around floor vents
- Radiator pipe holes
- The edge of a closet threshold
We measure the distance from the top surface of the wood down to the tongue-and-groove joint. This is the wear layer. If there is at least 1/8 of an inch of wood above the tongue, the floor can be safely sanded.
If the wood is worn down to the tongue, or if you can see the metal nails starting to show through the seams, the floor has reached the end of its sandable life. In these rare cases, sanding will cause the wood to splinter and crack. Instead of sanding, we must look at alternative restoration options or replacement.
Dealing with square nails and face-nailing
If your floor is old-growth Douglas fir or very early oak, you will likely encounter square-cut iron nails. In many historic homes, the outer edge boards were face-nailed (driven straight through the top of the wood rather than hidden in the tongue).
These nails present two major challenges:
- Sander damage: If a high-speed sanding belt hits a steel nail head, it will tear the sandpaper instantly, creating deep scratches in your floor and costing the crew time and materials.
- Aesthetic issues: If you sand off the top of a nail head, you leave a shiny, silver spot that will rust over time when exposed to water-based finishes.
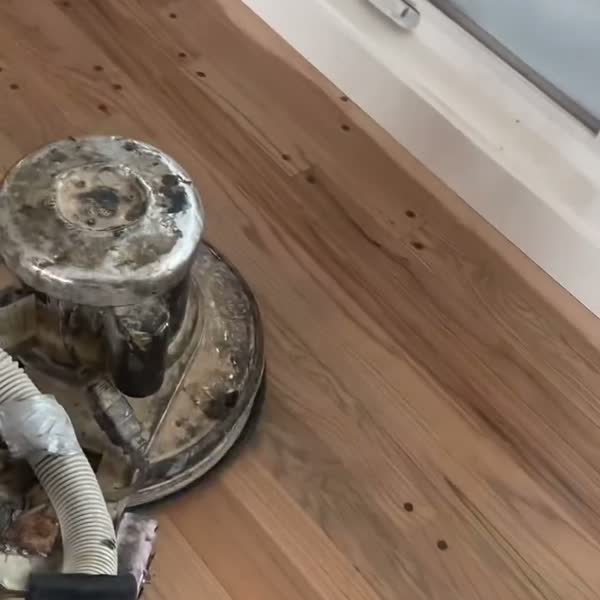
The secret to handling historic fasteners is setting them by hand. Before any sanding machine touches the wood, our crew walks the entire floor with a nail set and a hammer, driving every exposed nail head 1/8 of an inch below the surface.
Once the nails are set, we fill the holes with a custom-blended wood filler that matches the color of the wood. This process is time-consuming, but it protects our equipment and ensures the finished floor looks authentic and clean.
The challenge of old adhesives and linoleum
In the 1950s and 1960s, it was common practice to cover beautiful wood floors with wall-to-wall carpet, linoleum, or vinyl tile. When we peel back these layers today, we are often met with a sticky, black adhesive or a thick layer of paper backing stuck to the wood.
This black adhesive, often called cutback mastic, was frequently made with asphalt and, in many cases, asbestos.
Safety warning: Before attempting to sand or scrape any old black adhesive, it must be tested for asbestos. If it tests positive, it must be abated by a certified professional. Sanding asbestos mastic releases dangerous fibers into the air, creating a major health hazard.
If the adhesive is safe to remove, we do not start with the sander. The heat from a drum sander will melt the old glue, clogging the sandpaper in seconds and smearing the black mess deep into the wood grain.
Instead, we use heavy-duty floor scrapers and hand tools to peel away the bulk of the adhesive. We may use safe, citrus-based solvents to soften the glue before scraping. Only when the wood is dry and free of thick residue do we begin the sanding process.
Sanding old-growth wood: a gentle approach
Sanding a historic floor requires a different technique than sanding a brand-new white oak installation.
Old-growth Douglas fir, in particular, requires extreme care. Because fir is soft, a heavy drum sander can easily leave drum marks (small dips in the floor where the machine paused) or create an uneven surface.
We use a multi-step sanding process for historic floors:
- Rough sanding: We start with a lighter grit paper than we would use on modern oak, often beginning with 40-grit or 50-grit, to gently remove the old finish and flatten the boards without cutting too deep.
- Trio or multi-disc sanding: After the initial drum sanding, we use a planetary sander (like a Lägler Trio) that uses three rotating discs. This machine flattens the floor perfectly and eliminates the risk of drum marks.
- Detail edging: We sand the edges of the room by hand and with specialized edgers, blending the borders seamlessly into the main floor area.
- Hand scraping corners: Historic homes often have tight corners, built-in cabinets, and radiator pipes. We use hand scrapers to clean these hard-to-reach areas, ensuring every inch of the floor is prepared.
Grain matching for board repairs
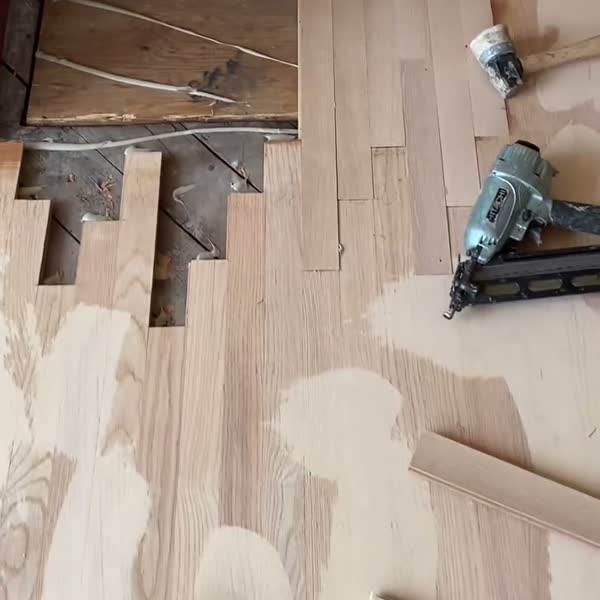
Almost every historic floor project requires some repairs. Whether it is fixing water damage around a radiator, patching a hole where a chimney once stood, or replacing split boards, finding matching wood is essential.
If you patch a 110-year-old old-growth Douglas fir floor with new fir from a local lumberyard, the patch will stand out like a sore thumb. New-growth wood has wide grain lines, fewer growth rings, and a different density, meaning it will stain and age completely differently.
To get a seamless repair, we source salvaged wood. We work with local architectural salvage yards in Portland to find floorboards taken from homes of the same era. By using wood that is already a century old, we match the grain density, growth rings, and natural color. When installed and sanded, these salvaged patches blend in perfectly.
Selecting the right finish for historic character
The finish you choose determines how the character of your historic floor will show. You want a finish that protects the wood while honoring the home's history.
The problem with high-gloss finishes
While high-gloss finishes look shiny and clean, they are rarely appropriate for historic homes. High gloss highlights every minor imperfection, dent, and gap in an old floor. It can make a beautiful, hand-crafted Craftsman floor look like it was coated in plastic.
Matte and satin finishes
We recommend satin, semi-gloss, or matte finishes for older homes. These lower-sheen options soften the look of the floor, diffusing light and hiding character marks. They allow the natural texture of the wood grain to take center stage.
Modern finishes with warm patina
If you want the durability of water-based finishes but want to preserve the warm, golden patina of old wood, we use ambering sealers. These sealers mimic the warm, rich tone of traditional oil finishes while allowing us to apply tough water-based topcoats.
Hardwax oils
Another excellent option for historic floors is a hardwax oil finish (such as Rubio Monocoat or Loba ImpactOil). These finishes penetrate the wood fibers rather than sitting on top as a plastic layer. They highlight the raw beauty of the wood, feel wonderful underfoot, and allow for easy spot repairs if a section gets scratched, avoiding the need to sand the entire floor again.
Preserving the story of your home
When restoring historic floors, the goal is not to make them look like a brand-new plastic floor. The goal is to celebrate their history while giving them another century of life.
Minor gaps between boards (which occur naturally as the home settles), character marks, and the deep amber color are part of the home's story. A professional restoration respects these details while ensuring the floor is smooth, clean, and structurally sound.
If you are lucky enough to have original floors in your classic Portland home, let us help you bring them back to life.
Get a free quote today to schedule a walkthrough of your historic property. We will evaluate your floors, measure the wear layer, identify the wood species, and discuss the best restoration plan to preserve your home's historic beauty.
Frequently asked questions
Can 100-year-old Douglas fir floors in Portland Craftsman homes be sanded again?
Yes, provided at least 1/8 inch (3mm) of wood remains above the tongue. We inspect wear-layer depth at floor registers and use low-pressure belt sanding to preserve softwood grain.
How do you replace missing boards over old radiator or floor-furnace grates?
We source reclaimed old-growth vertical-grain Douglas fir or narrow-strip oak salvaged from Pacific Northwest architectural demolitions and weave the planks into the surrounding floor.
What finish looks authentic on historic 1910s–1930s Portland bungalow floors?
Bona AmberSeal paired with Bona Traffic HD Satin or Matte replicates the warm honey patina of vintage oil varnish with zero toxic fumes and commercial scratch durability.
Topics